Discord is one of the most popular chatting and streaming platforms on the internet, especially among gamers. It’s also a wonderful community platform for people to share their interests and start discussions.
If you want to prevent outsiders from coming into your community’s server, you should consider making the Discord server private or invite-only.
How To Make Discord Invite-Only
To make discord invite-only, you need to follow these steps:
- Open the server settings for a server in which you have moderator permissions.
- Open the “Roles” settings.
- Edit “Default Permissions”.
- Disable the “Create Invites” permission.
- Create a new invite link.
- Limit the new invite link to expire after a single use.
In this article, let’s go through each step one by one. I’ll also share how you can make an invite-only Discord channel and the reasons why you should consider making your Discord server and channel invite-only.
Steps To Make a Discord Server Invite-Only
Disable The “Create Invites” Permission For @Everyone
The first step to make your Discord server invite-only is to disable “Create Invite” permissions for @everyone. This will prevent users on your server from creating new invite links.
To do this, open your Discord server and open the Server Settings menu.
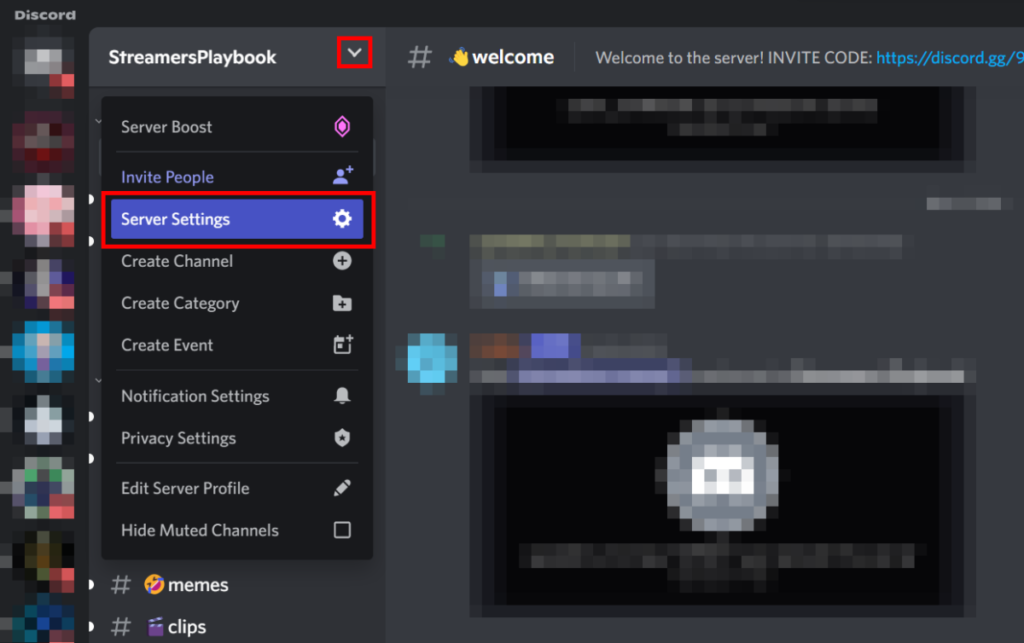
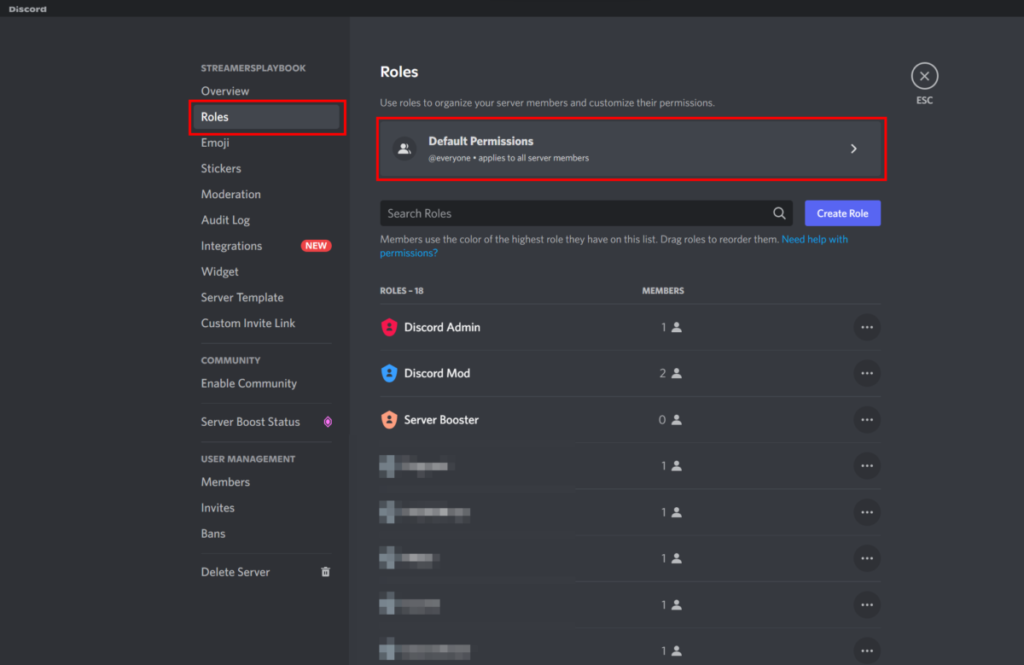
From inside your server’s settings menu, open up the “Roles” settings. Then, click on “Default Permissions” to edit the default permissions for @everyone.
From inside the permissions settings, disable the “Create Invites” permission. You’ll need to toggle the switch from green to gray to disable the permission.
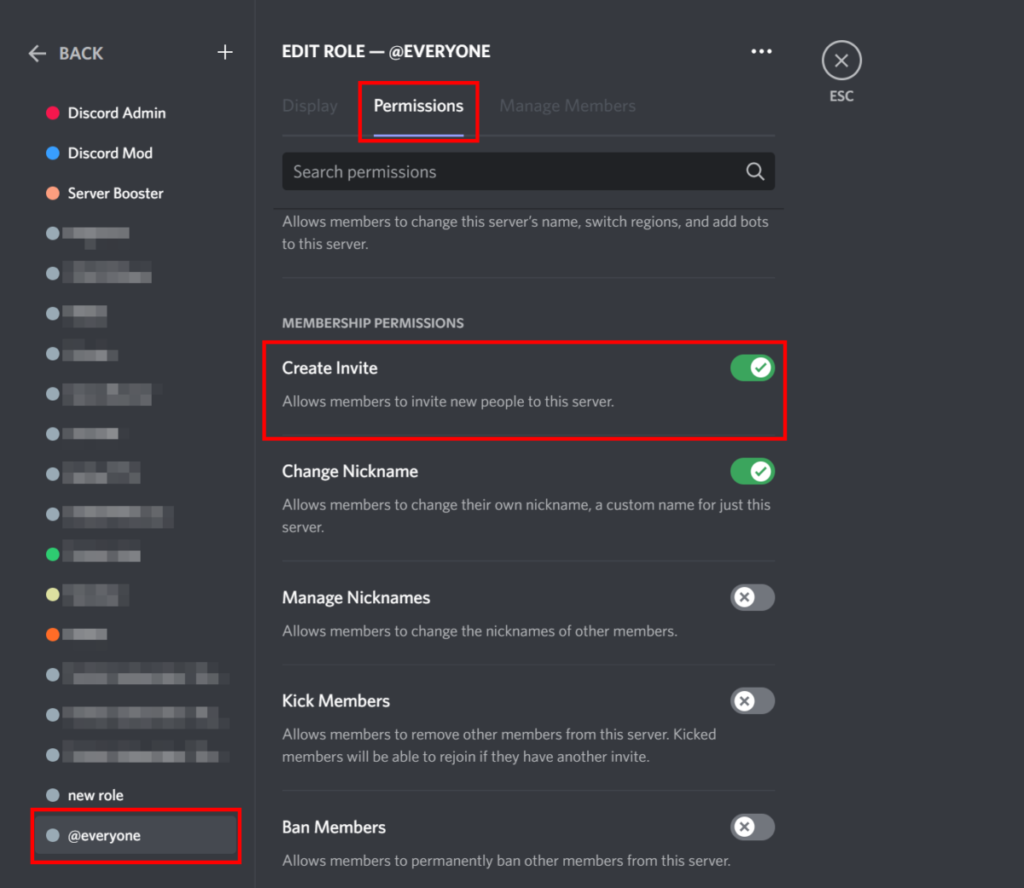
Once you disable this permission, users without a role in your server will not be able to invite other users to your server or generate invite links.
If you have roles on your server, you’ll need to make sure to disable the “Create Invite” permission for those roles, as well.
Once you’ve disabled the “Create Invite” permission for all roles on your server (except moderator), only moderators will be allowed to generate invite links or invite users to the server.
Create A Limited-use Invite Link
After you’ve disabled the “Create Invites” permission for the users on your server, you’ll also want to take steps to make sure invite links on your server cannot be used multiple times.
If you do not create your invite links the proper way, then the same link could potentially be used by multiple users to join your server.
To prevent this, you should always limit invite links you create to a single use. Here’s how.
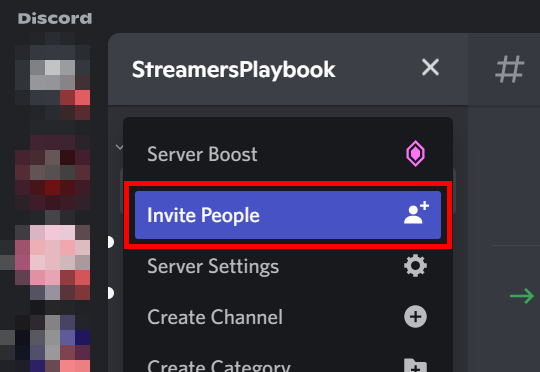
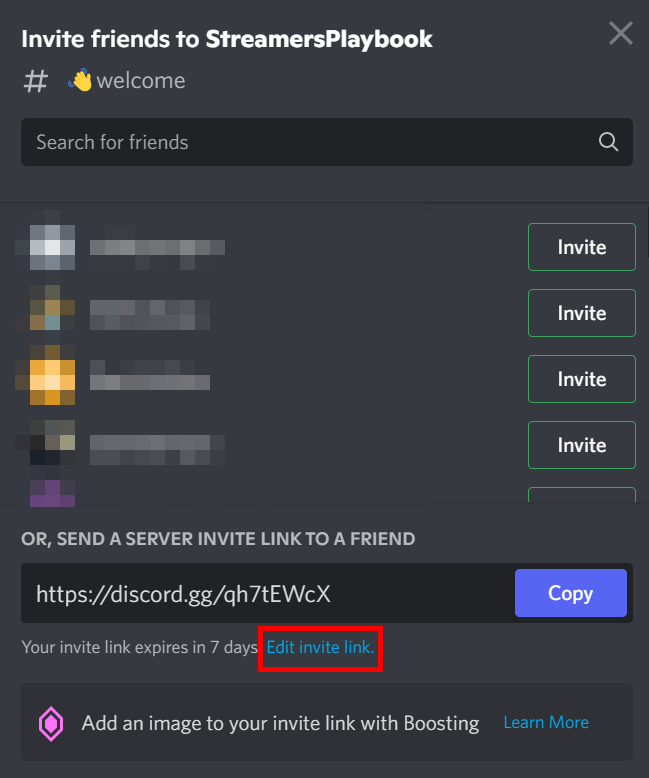
Click on “Invite People” from your server’s dropdown menu.
From the invite menu, click on “Edit Invite Link”.
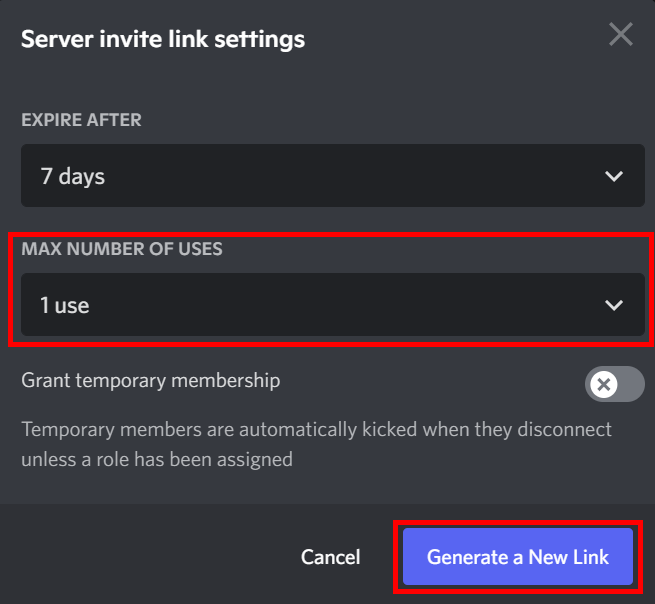
From the “Edit Invite Link” menu, change the “Max Number of Uses” to “1 use”. This will make it so that the invite link generated can only be used once. Click “Generate a New Link” to get your new link.
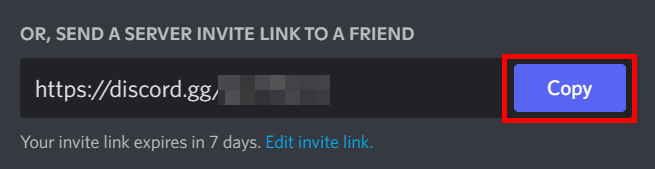
Copy your new link by clicking the “Copy” button.
How To Make a Discord Channel Invite-Only
Aside from making your Discord server invite-only, you can also do the same thing with your Discord channel. That way, only certain members will be able to access that specific channel, allowing you to create private and exclusive chat rooms for your community.
Here’s what you need to do to make a Discord channel invite-only:
- Create a new role.
- Create a private channel with access limited just to the newly-created role.
- Assign the role to users you want to have access to the channel.
Creating a super-secret channel can help you organize your community and build better chat rooms. You can also reward members who make the most contribution by giving them access to the super-secret channel. Now, let’s go through those steps one by one.
1. Create A New Role
If you’ve already created new roles when creating your invite-only Discord server, feel free to skip this step. Otherwise, you can create new roles to which you can grant special access to specific channels.
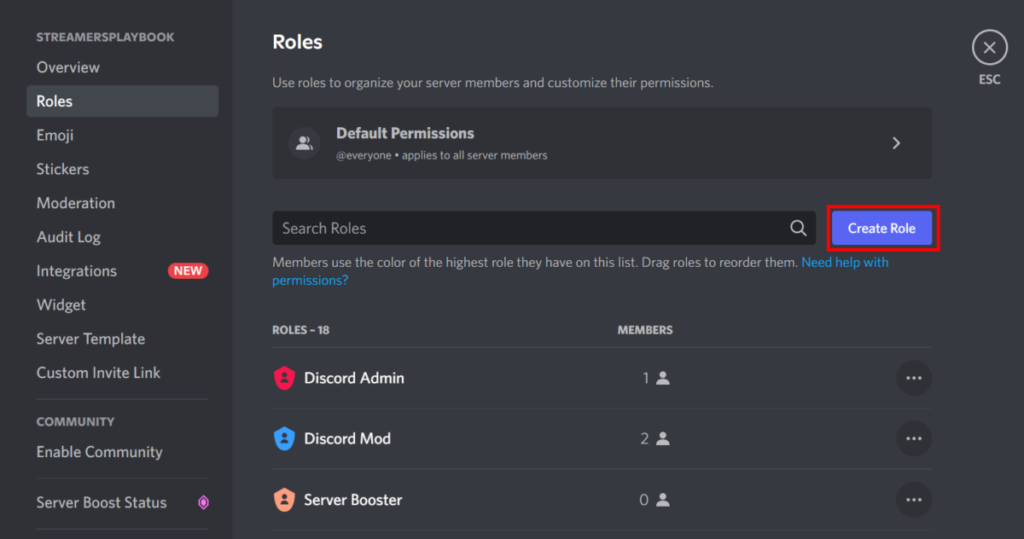
To do this, open the Roles tab in the Server Settings menu. Then, press the ‘+’ button to create a new role for your invite-only channel.
Create a name for your new role. You’ll need to know this later to add the role to your private channel.
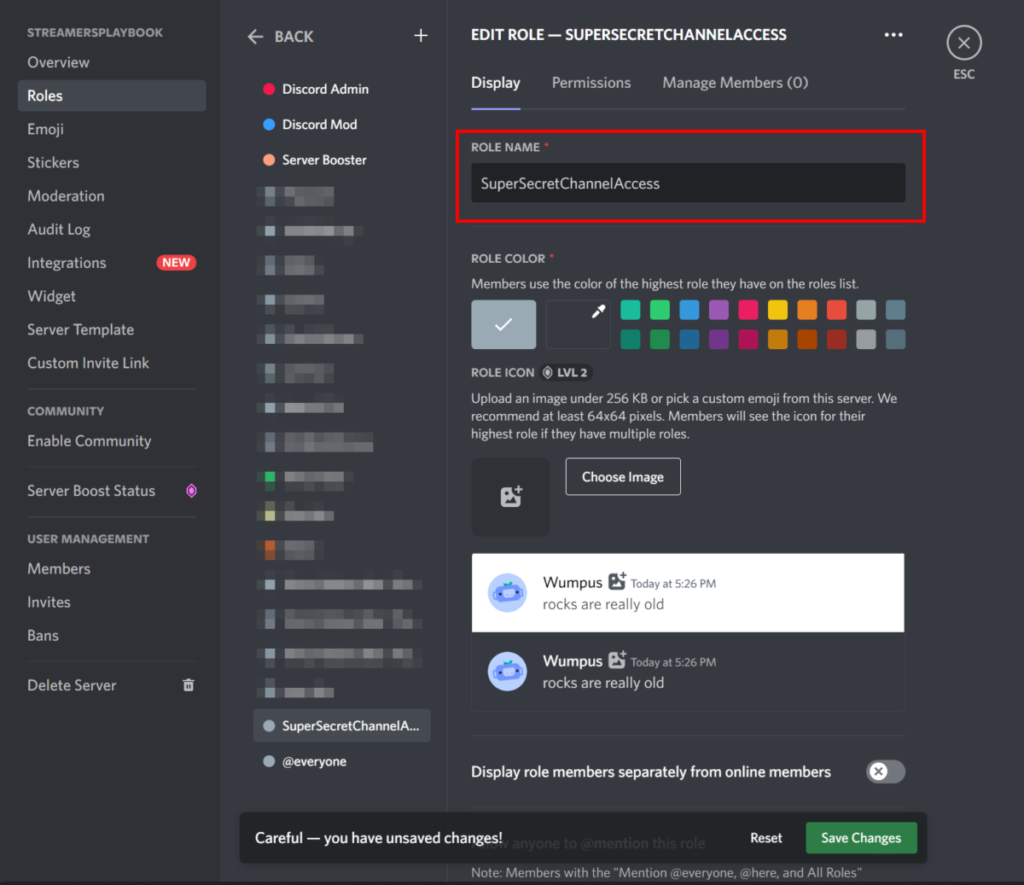
If you wish, you can also grant this role various permissions within your server.
2. Create a Private Channel
Now, all there’s left to do is to create your new, invite-only channel.
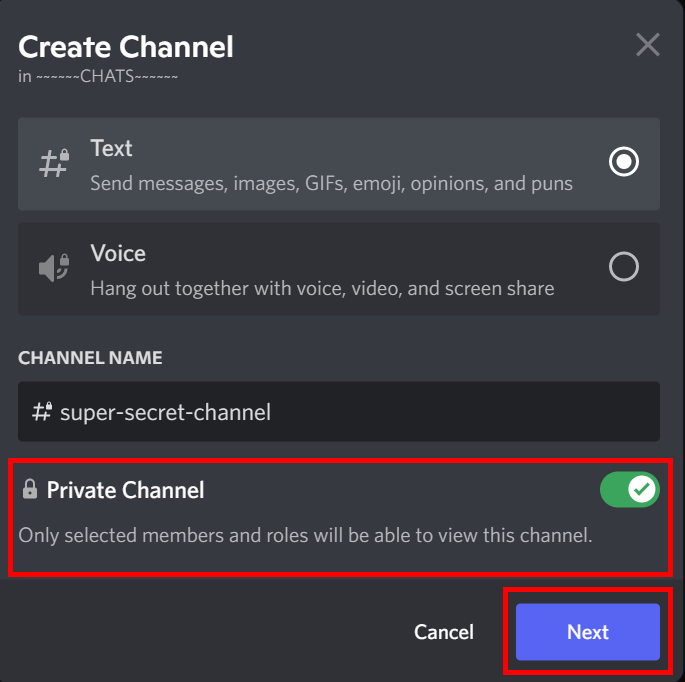
To create your private channel, first, you must click the ‘+’ button next to Text Channels or Voice Channels. Type in your new channel’s name and make sure “Private Channel” is enabled.
Next, you’ll need to assign your newly-created role to the private channel. Select the role from the list of roles on the “Add Members or Roles” screen. You can also add users directly by username.
This will make it so that only users with the proper role or permissions will be able to see and interact with the channel.
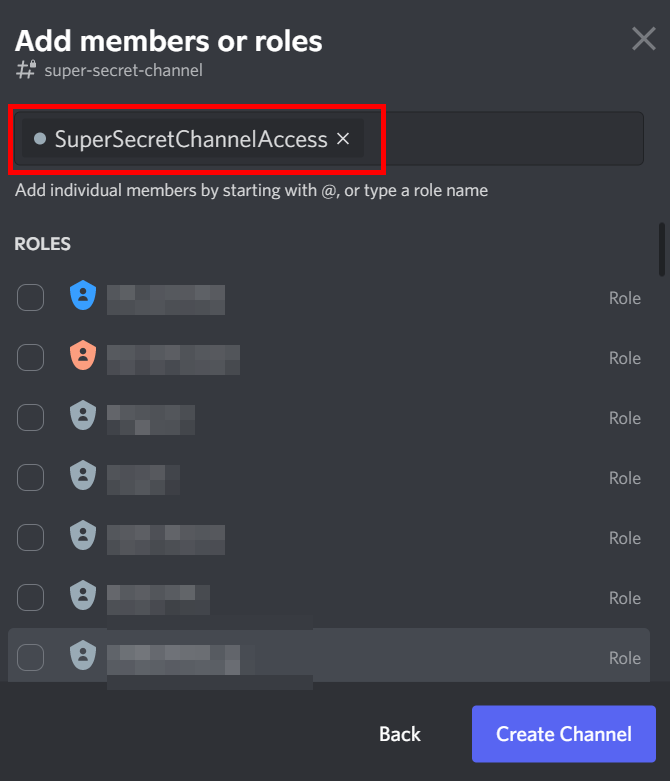
Finally, click “Create Channel”, and your invite-only Discord channel is done!
3. Assign The Role To Users
Next, you can assign the role you’ve created to specific users.
You can do this by right clicking a user’s name on the right-hand side of your server. Then, click the “Roles” option and click on the role you created in step one to assign the role to the user.

Reasons To Make a Discord Server Invite-Only
People usually make private or invite-only servers to help make moderation easier. If you own a regular Discord server, it might be difficult to regulate your community. Making your Discord server private or invite-only can help with the task.
Another major reason to make a Discord server invite-only is to restrict outsiders. If you’re worried an outsider might disrupt the community, making your server private can prevent them from joining. It’s also a great way to create structure within the community, so only members with a specific role can do certain things.
Additionally, making an invite-only Discord server can also help you get rid of spammers. Of course, it will usually simply prevent them from joining in the first place. However, if they do get in and spam the community, you can easily take away their privileges and kick them out.
Reasons To Make a Discord Channel Invite-Only
One of the main reasons to make a Discord channel invite-only is to create an exclusive chat room for specific members. This can help discussions flow better without other server members disrupting the conversation.
By default, Discord channels are usually open to every server member. However, there are various benefits you can get from making a Discord channel invite-only.
For example, it’s a fantastic way to reward members. You can grant them access to this VIP chat room once they’ve contributed enough. Such a reward can also motivate other members to contribute more high-quality content more often, making the community even richer and better.
For even more streaming tips and how-to content check out my Youtube channel here. And if you want to check out my streams then stop by my Twitch channel here.
Final Thoughts
Discord is a fantastic group-chat platform for creating vibrant communities. Making your Discord server private or invite-only is a great way to ensure no outsider or spammer joins in your community. Moreover, you can also make certain channels private to create exclusive chat rooms for certain members of your server.
Fortunately, making Discord server and channel invite-only is an easy task. As the moderator or owner of the server, you can easily change the Settings and ensure only certain people can join or have certain privileges.
Sources
- Discord Support: How do I set up a private server?
- Discord Support: How do I set up a Role-Exclusive channel?
- Reddit: Invite only server?
- Wiki How: How to Make a Discord Channel Private on a PC or Mac
- Business Insider: How to add people on Discord by sending them an invitation link
Eric streams 3 days a week on Twitch and uploads weekly to Youtube under the moniker, StreamersPlaybook. He loves gaming, PCs, and anything else related to tech. He’s the founder of the website StreamersPlaybook and loves helping people answer their streaming, gaming, and PC questions.