Being prepared to stream is one of the most crucial parts of streaming. What you do before a stream will help gain and maintain viewers on your channel. In this article I go over all the things you should do before every stream.
What To Do Before A Stream
Here is a list of 17 things you should be doing before your live streams. I go into more detail further down so be sure to scroll down and read through to learn ways to improve your stream before ever going live.
- Plan out your stream (games, things to talk about, giveaways, etc.)
- Post that you are going live to your social media accounts
- Set up any music you want to play on the stream
- Add tags to your stream
- Look presentable
- Edit your title
- Eat and drink before you stream
- Get snacks and drinks for your stream
- Use the restroom
- Edit your go live notification
- Place your stream in the right category
- Make sure the game you are going to play is downloaded and up to date
- Test your audio and video
- Adjust your lighting
- Clean up anything in your room that is visible on stream
- Switch to the right scene
- Post that you are going live in your discord
Plan Out Your Stream (Games, Things To Talk About, Giveaways, Etc.)
It’s important to have a game plan for your stream. Before you ever go live decide which games you will play what things you will discuss on stream and any other detail of the stream that needs addressing.
I don’t think you should make your streams 100% scripted as that would make them less entertaining, but it is important that you have a rough outline of how you want your stream to be.
Some streamers will even plan out questions and conversations they will have with their viewers. If you are a person who is less social this may not be a bad idea.
Post That You Are Going Live To Your Social Media Accounts
Posting that you are going live to your different social media accounts is important because it helps give you a bigger reach.
Go live notifications do not get sent out 100% of the time, and even if they do there’s always the chance a viewer may not see it.
For this reason it is best to post that you are going live on your different social media accounts to increase the likelihood that your viewers will see it and then stop by.
These go live posts may also attract new viewers as well.
And just so you know, the social media platforms with the most gamers on them are Twitter and Instagram. I recommend sticking to these two platforms, but the choice is ultimately yours.
You won’t be hurt by posting too many go lives, but you may just be wasting your time if you are trying to post go lives on Facebook and other platforms with less gamers and streamers on them.
Set Up Any Music You Want To Play On The Stream
Music can be a major vibe for your stream. Most streamers have some kind of music that they play on stream in between matches of a game or in between transitions on their stream.
If you want to play music on your stream, you will want to make sure that it is good to go before you ever go live. It’s also good to mix it up every now and again with some new music.
But if you do plan to stream with music you will want to make sure that the music is not copyrighted. One of the best places I have found to get copyright free music is Epidemic Sound (click here to check them out).
If you are looking for music for your stream check them out. I use them for my music and they are great.
Add Tags To Your Stream
Both Twitch and Youtube allow you to add tags to your stream. These tags help you stand out even more when users are searching for streams to watch.
For example, Twitch has a “playing with viewers” tag that lets users know you are playing with viewers from your stream.
Now if someone is looking for a streamer to play with, and they search the “playing with viewers” tag, your stream has a better chance of appearing because only the streams with that tag will appear.
If you want to know what some of the best Twitch tags are for being discovered then check out my article here.
Now tags on Youtuber work differently. Currently, tags on Youtube are used to clarify what your stream will be about. It doesn’t hurt to put them, but they have less of an impact on being discovered than Twitch tags do.
Regardless of if you are streaming on Twitch. Youtube or both you should be adding tags before every stream. They only take a few minutes to add and can help give your stream a slight bump in discoverability.
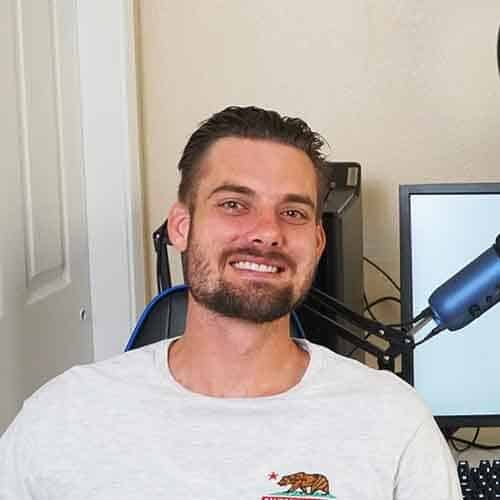
Look Presentable
The word “presentable” is subjective here. Some people dress up while they stream, some streamers stream in their PJs and others stream in basketball shorts and a T.
It really just depends on how you want to be perceived by your viewers and then matching that look.
If you don’t have a certain look you are trying to convey then it is best to just look nice: nice T, hair lookin nice, etc. Treat it like you would a job interview.
Edit Your Title
It doesn’t matter where you stream, a title is very important. A carefully crafted title could be the difference between someone clicking on your stream and watching you or them just scrolling right on by your stream.
Before every stream you should take a few minutes to create a unique title that you feel like will pull people into your stream.
Too often I see streamers who just reuse the same title over and over. No creativity. Nothing clickable. If it is working great, but if it is not then you need to try mixing up your titles.
As a live streamer your title is one of the few tools you have to attract viewers into your stream and so it is highly recommended that you take advantage of this.
Eat And Drink Before You Stream
Streaming takes a lot of energy and so you will want to make sure you have a good meal inside of you before going live.
If not, you may be streaming while at the same time fighting off your hunger. Not a fun experience and it will take attention away from your stream.
Get Snacks And Drinks For Your Stream
Most streams will last a couple hours. For most people that is a long time to go without eating or drinking.
Rather than having to go and ravage through your kitchen for a snack while you are live, it is better to have snacks and drinks ready to go.
The reason being is that anytime you leave your stream you are risking losing the viewers you already have, as well as turning away any viewers who see your stream while you are away.
Viewers who are browsing through looking for streams to watch will be much less likely to click on a stream with no streamer in it so try to avoid being off camera as much as you can.
Use The Restroom
Self explanatory. Handle your business before streaming. Not only will this stop you from streaming uncomfortably, like I already touched on, people who see streams where the streamer is AFK are less likely to visit and stay.
Edit Your Go Live Notification
The Go Live notifications on Twitch and Youtube work slightly differently, but they still serve the same purpose.
When you go live on Twitch, Twitch sends out a Go Live notification message to those who follow you and have their notifications turned on. This is to let them know that you just went live.
You MUST edit these. It’s not required, but if you are not editing these every time that you go live then you are missing out on a major opportunity to attract viewers into you stream.
And similar to your title, you want to edit your Go Live notifications in a way that makes people want to click on them. If you want to know how to see how your current go live notifications on Twitch are performing check out this article.
And for help on editing your Go Live notifications on Twitch check out this video here:
If you are on Youtube then your Go Live notification will just be the title of your stream plus a thumbnail. These Go Live notifications look much better than the Twitch notifications, but they do require more work.
You can choose to change your thumbnail each time you go live, or you could just have one really good thumbnail that you use.
It’s obviously better to create a new thumbnail each time you go live, but this can be difficult if you don’t have the time or the resources.
Either way, editing your Go Live notifications is very important and should be done before every stream.
Place Your Stream In The Right Category
Before you begin streaming it is important to make sure that your stream is in the right category to make it easier for viewers to find.
For Twitch your category will be the game you are streaming (Fortnite, League of Legends, etc.) or the type of stream that you will be doing (fishing, cooking, etc.).
On Youtube your categories will be things such as gaming, music, sports, etc. and not the specific game that you are playing.
If you will be streaming a video game on Youtube then just choose “gaming” as your category. Then in your title make it clear as to what game you are playing.
Not only does having your stream in the right category make it easier for users to find, it also is a requirement if you are on Twitch. If you are streaming in the wrong category you may get in trouble by Twitch.
If you stream the same game every stream it is not a big deal, but if you change what game you stream often then it is worth it to double check and make sure you are in the right category before you go live.
Make Sure The Game You Are Going To Play Is Downloaded And Up To Date
I have made this mistake many times and that is why I have included it here. Nothing is worse than getting your viewers hyped up for a game, only to go live and realize you have a 1 hour download.
Having to download or update a game while you are live will definitely chase away viewers and is something that can easily be done before you go live.
So before you go live make sure to check and make sure your game is all up to date and that you are ready to roll.
Test Your Audio And Video
Before going live you should test both your audio and your video. If you open your streaming software it will give you a preview of what your stream will look like, but I like to to a recoding and see how it looks and sounds just to be safe.
Once I have my stream all set up I make a quick 5-10 second video of me talk and moving around just to make sure everything is working right. I look at the video and if it looks and sounds good then I go live.
You can also do a test stream on Twitch without even going live. If you want to know how to do that then check out the video below.
Adjust Your Lighting
Lighting is going to make you and your stream look a lot more legit. Before going live, make sure that the lighting looks right on your stream. Sometimes, depending on your setup, a gloomy day can mess up your lighting.
Before you go live, open up your streaming software and look at the streaming preview that is front and center in the middle of the screen. If it looks good cool. If it looks off, adjust your lighting until it looks good then go live.
Clean Up Anything In Your Room That Is Visible On Stream
If your room is a mess, make sure to clean it up or move the clutter out of view of your camera before going live. Having a cluttered mess behind you looks unprofessional and gives the vibe that you don’t really care.
You don’t have to go crazy and deep clean everything, but just make sure that your background looks neat and put together. This will make you look like a more legit streamer.
Switch To The Right Scene
If you are like most streamers you probably have several scenes on your streaming software.
A live scene, an offline screen, a starting soon screen, etc., etc. Before you go live you will want to make sure that you have the proper scene selected before going live.
It would be awkward going live with an offline screen so just make sure that you have the right scene selected before going live.
Post That You Are Going Live In Your Discord
Just as important as posting your Go Live notifications on your social media is posting that you are going live in your Discord.
Discord has more of a community vibe and often times those who are in your Discord will be more likely to stop by your streams than other user.
And not to mention you can actually set up your Discord to notify all those in your Discord when you go live so you don’t even have to do it.
We talked about what to do before your stream, but if you want to know what to do after your stream then check out this article here.
And if you need help planning out your stream then check out my guide on how to plan here.
For even more streaming tips and how-to content check out my Youtube channel here. And if you want to check out my streams then stop by my Twitch channel here.
Eric streams 3 days a week on Twitch and uploads weekly to Youtube under the moniker, StreamersPlaybook. He loves gaming, PCs, and anything else related to tech. He’s the founder of the website StreamersPlaybook and loves helping people answer their streaming, gaming, and PC questions.
What To Do After A Stream? Do These Things For Success – Streamers Playbook
Monday 1st of November 2021
[…] We have talked about what to do before a stream, but if you want to know what you should do before a stream then check out my article here. […]